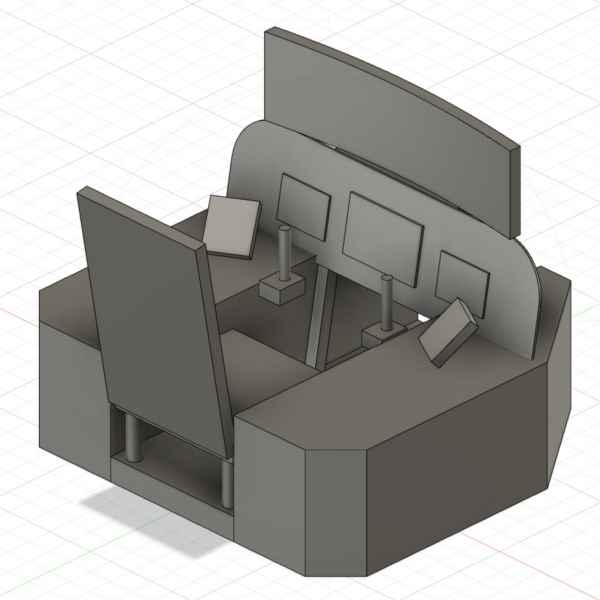
This cockpit (that I call Simpit 2.0) was my first full cockpit build that I built during Fall 2021. After my new cockpit was ready to be moved to its place just before end of 2022, I sold this one away (but it found a good home). But I decided to keep all the materials here in case they’re useful for someone.
The frame is built around an old Volvo car seat and is made mostly from 1×2 wood and chipboard. I live in an old wooden house so I’ve gathered some experience with woodworking and have a nice collection of basic tools (table saw, jig saw, circular saw etc). This page goes through the build process.
Normally I start my woodworking projects by sketching something on a paper but this time I learned to use Fusion 360. This was mostly to give me some rough ideas of the frame, but I ended up getting accurate measurements for the corners of side panels.
If you’re just starting with woodworking, I would recommend making the side panels just basic boxes instead of anything more complicated. Also if you’re using thick enough plywood, you don’t need to build the internal frame. I chose this route since it was significantly cheaper.
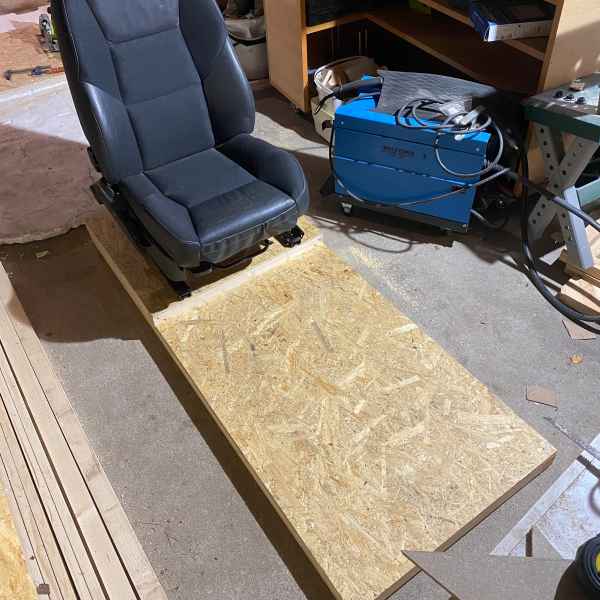
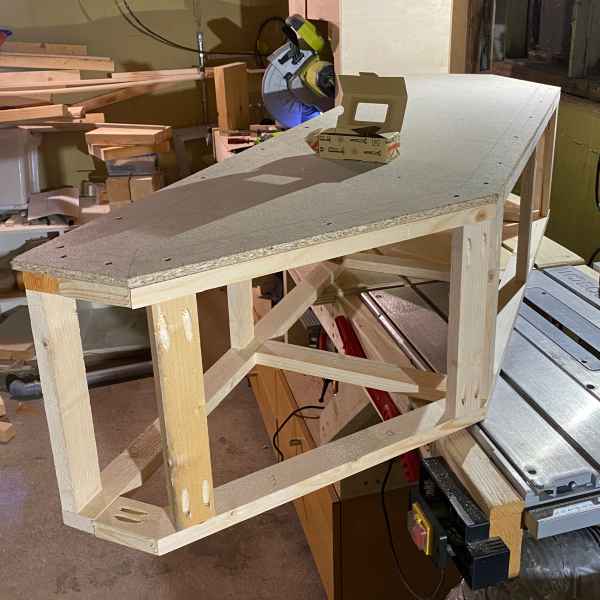
First step was to create the base so I could get dimensions (e.g. joystick placement) right by sitting down and trying out what would work.
The base is made from 2×2 wood and OSB sheets. I would have preferred plywood but they didn’t have anything suitable available at the time and this was good enough. And cheaper.
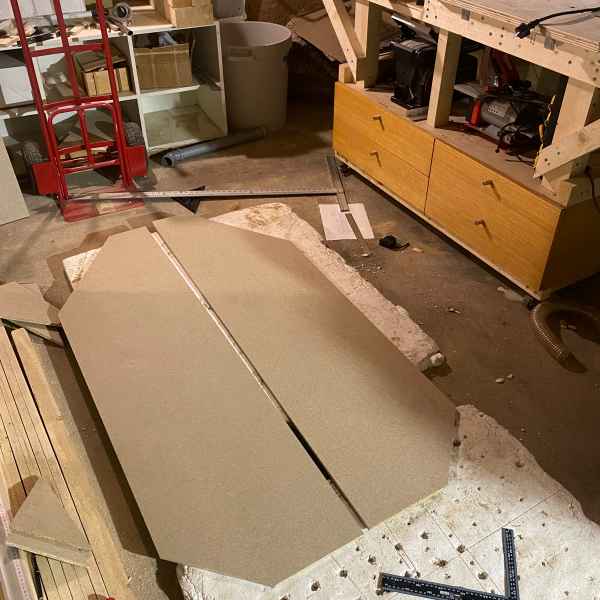
I cut the top covers with a hand held circular saw while using other sheets as guides. My table saw just wasn’t large enough for these sheets.
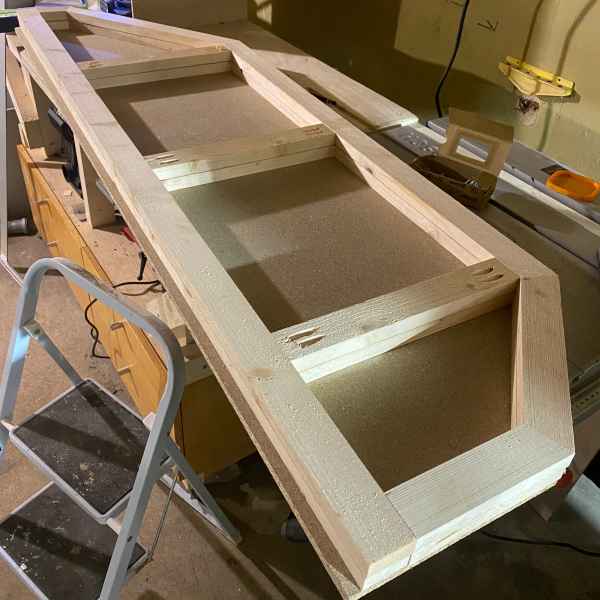
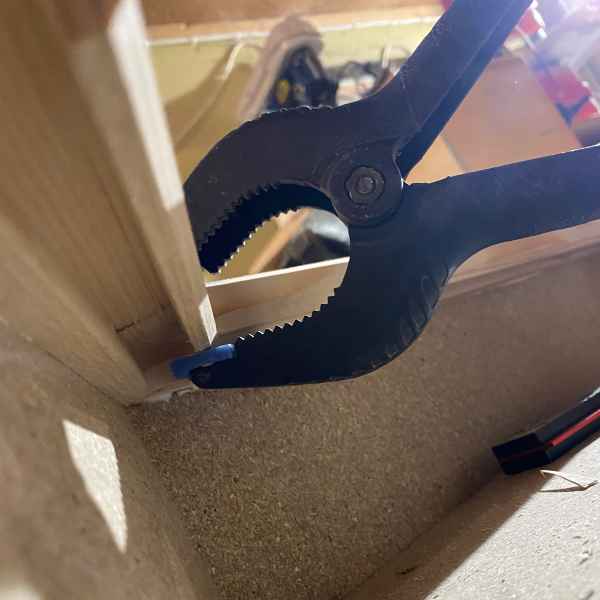
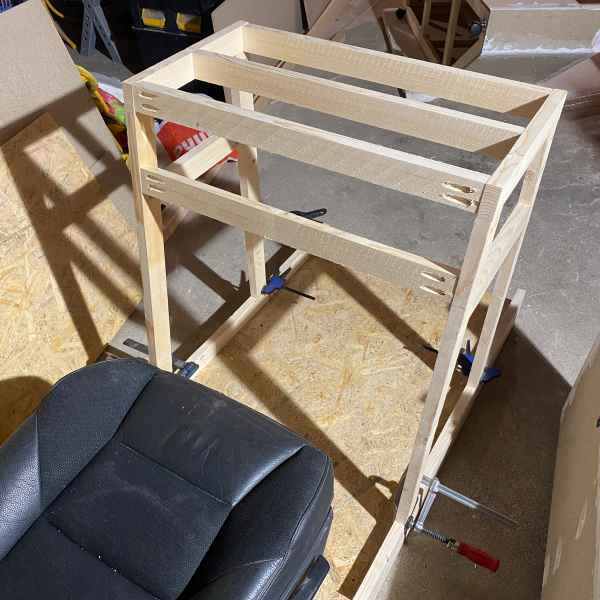
With the help of top covers, I cut and assembled the top and bottom parts of the inner frame from 1×2 wood. I used pocket holes to assemble the frame.
After adding the vertical supports I attached the top cover into the frame.
Here I made a small mistake: I should have sunken the screws even further (to cover them with wood filler) or let them be flush with the surface. Now it was somewhat random.
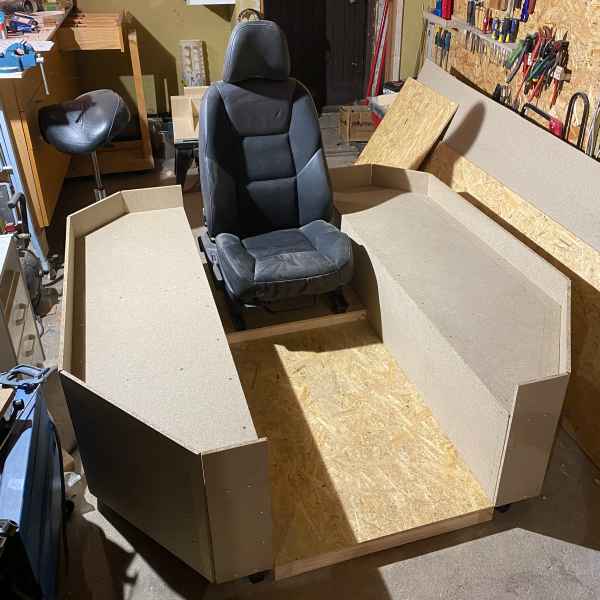
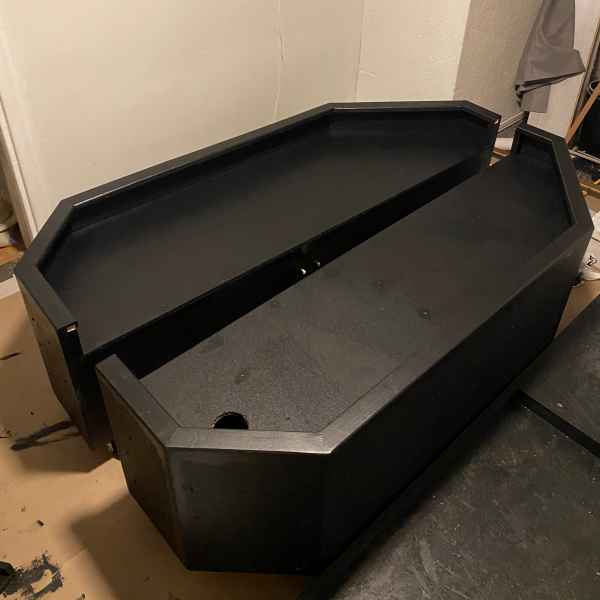
Side covers in place. There are casters under the side panels so they’re easy to move around.
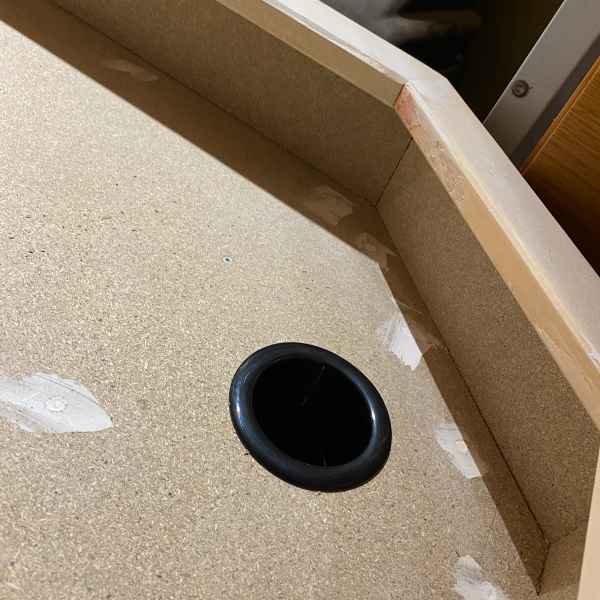
And a cup holder. Never forget the cup holder.
Again some careful angle measurements with the trims.
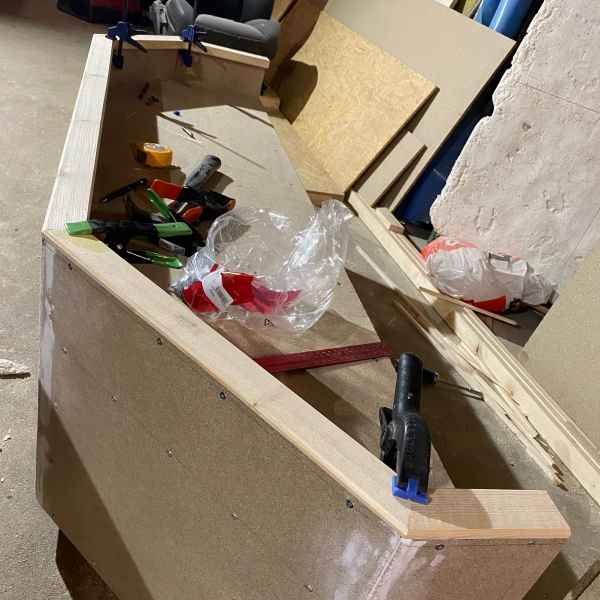
As seen in previous photos, I didn’t cut the ends of the side cover sheets to an angle. So I added wedges to cover the gaps and then finished it with wood filler. Good enough after painting.
There’s also a groove inside the trim so I can hide an LED strip there.
Center panel’s frame. I decided to angle it by 10 degrees and it seems to work nicely for me.
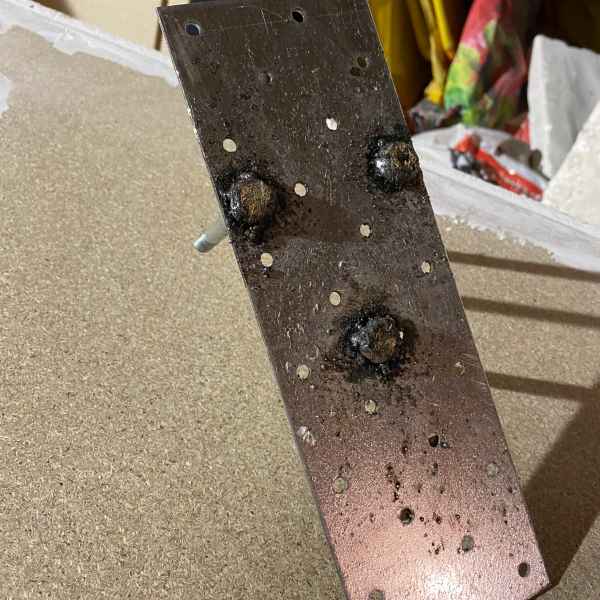
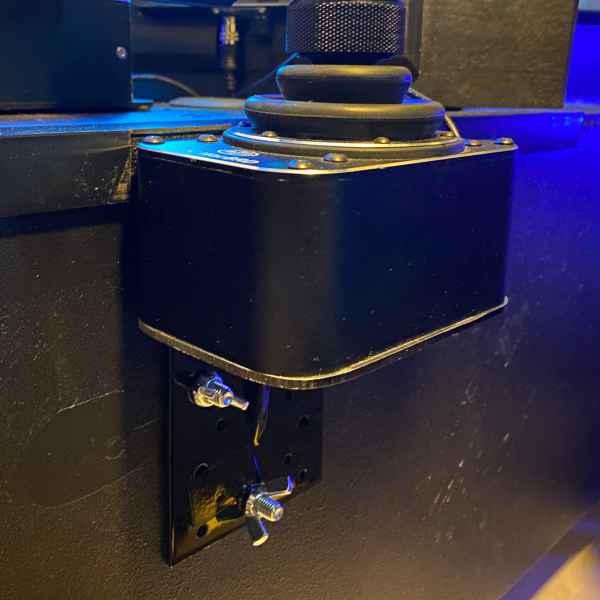
Did I mention that I suck at welding (among other things I suck at)? I think this was the first thing I welded anything in decades and the first time using a mig welder. But it’s good enough for the purpose: it’s the attachment for joysticks and it’s hidden inside.
Perhaps I have some day time to learn welding too…
The heads of the screws in previous photo come through the side and I can attach (and especially remove) joystick easily with wing nuts.
My dad was visiting us and helped me to carry these to the simpit room before I had time to paint them so I ended up painting everything there.
One major reason for the black color is that I just happened to have enough black paint available from previous projects.
Everything attached together. The side panels are attached to the center structure with hinges so I can open them like car doors and step inside easily.
There is a carpet under my feet. Something like textured aluminum plate would probably have been more “authentic” but I chose comfort.
Displays
My dream is to one day have a curved 270 degree screen going around the setup with three projectors. But that’s in far future; too costly for now and currently Star Citizen supports wide resolutions quite badly.
I had a Samsung G9 but had a nasty mishap while carrying it to the simpit room to try it out: I banged it to a door handle ever so slightly. But it was bad enough to break it beyond repair. Luckily I have a good home insurance. I ended up opting for three 32″ Samsung G5s which was also less expensive option. The top screen is a basic 24″ display that I got for dirt cheap from a Black Friday sale. And the bottom display is something I’ll cover in the Center panel section.
The setup could give me something like 160 or 170 degree field-of-view and a resolution of 7680 x 1440. And Star Citizen runs surprisingly well with that resolution.
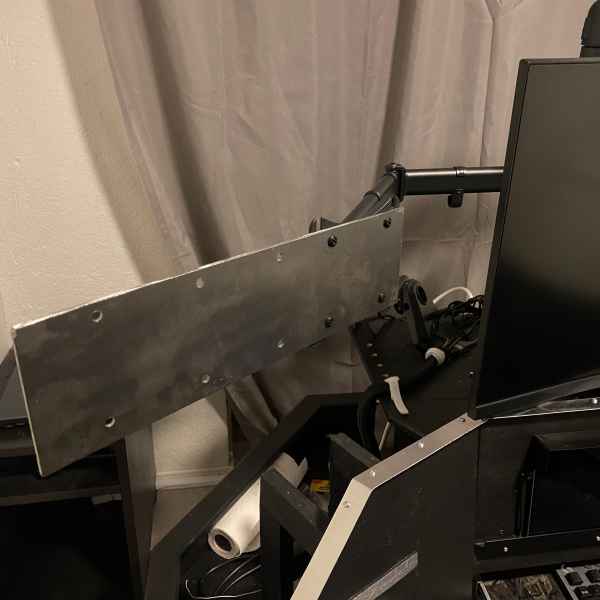
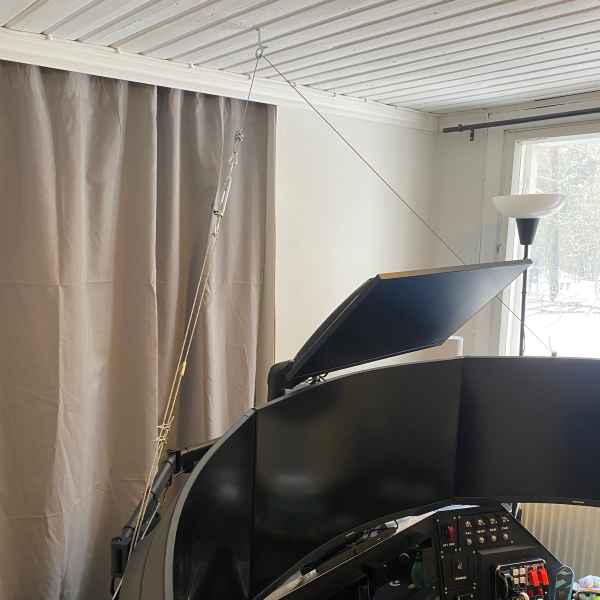
I bought a triple display arm that was supposed to hold three 32″ displays but I didn’t take the curvature of the G5 into account. So I had to make something up.
I ended up using some metal wire to support the extra length of the display arms.
The top display is on its own arm that is attached to the triple display stand. I use it mostly for stuff like Discord.
Controls
The heart of any simulator setup: controllers. I’m a big Virpil fan but as far as I understand, VKB also makes good controllers. And the VKB Gladiator NXTs (or EVOs now?) are much less expensive way to get a high quality HOSAS (hands on stick and stick, as opposed to HOTAS, hands on throttle and stick).
My binds for Star Citizen aren’t aimed to be the most competitive but most fun for me.
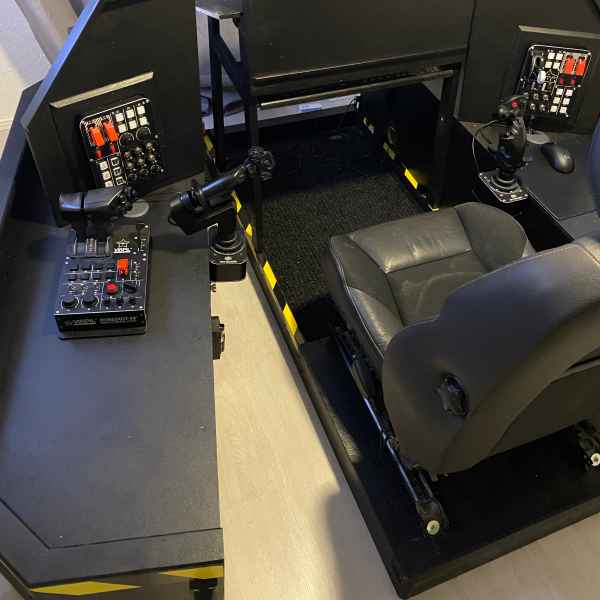
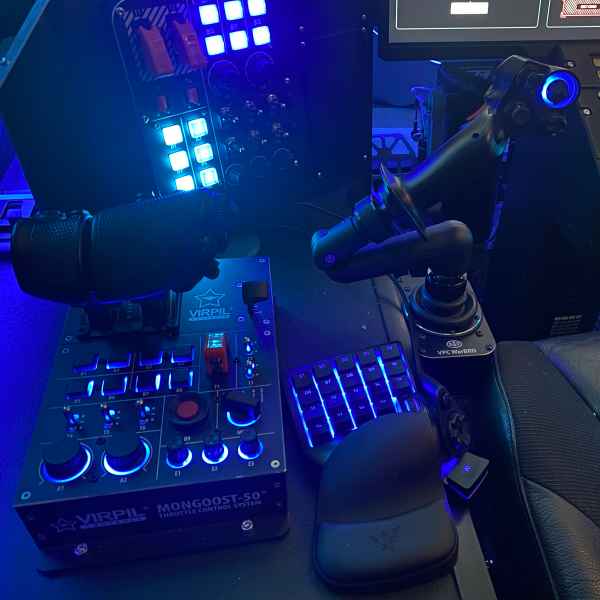
Right hand: Virpil WarBRD base with Constellation Alpha grip. Y-axis controls pitch and X-axis roll (like in a plane).
Left hand: Virpil WarBRD base with Constellation Delta grip and Z-extension adapter. Y-axis controls throttle, X-axis controls strafe left/right and twist axis controls strafe up/down.
Pedals: Thrustmaster TRP, controls yaw.
Throttle: Virpil Mongoose-50 throttle. The throttle axis controls speed limiter.
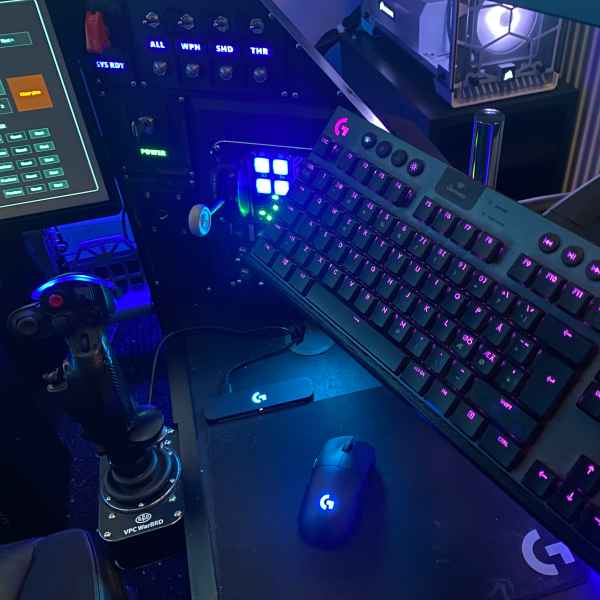
Keyboard: Since I can’t fit a shelf for keyboard under the center panel, I’m using Razer Tartarus V2 for FPS movement.
Joystick Gremlin and vJoy
Currently Star Citizen handles controller setups quite badly and even after they fix it (it’s alpha, so they’ll get to it at some point), it might never be enough for more complicated setups. That’s why many people with more advanced setups use some extra software.
I’m using three programs for my control setup:
vJoy is a software that allows me to create virtual controllers. Games see these controllers as normal controllers.
Joystick Gremlin captures the stuff I do with physical controllers and changes them into vJoy inputs (or just keyboard key presses). It allows me to do a lot of other nice stuff too, like create different modes.
HidHide hides the physical controllers from games. If I map a button to a virtual joystick and press the button, game gets two simultaneous button presses without a software like this. People previously used Devreorder for this but it doesn’t work with EAC.
If you want to learn more about this topic, Ventovar gaming has made an excellent guide about it, just change the Devreorder to HidHide: Intro to Advanced Joystick Configs.
Right side is for basic controls as you would have in an airplane. This probably isn’t the most effective setup in space but it’s the most fun for me and makes it easier to fly normal planes in games like FS2020.
I had some extra monitor arm parts lying around that I used to make a keyboard stand from. I can push it away or grab the keyboard and use it on my lap.
With six degrees freedom in space, you can move up/down and left/right besides basic thruster control. This is why many people use a joystick for left hand with space games like Star Citizen and Elite: Dangerous.
The angled adapter for left stick makes it feel more natural. Both Virpil and VKB have made their own adapters but you can also print your own with a 3D printer. For some time I used this excellent model.
The throttle is a natural option for flight simulators. With Star Citizen I use it to control the speed limiter and use it with cruise control. I can easily take the left joystick off and bring the throttle closer if I want to fly normal aircrafts.
Razer Tartarus V2 fits quite well between throttle and left joystick. This was not intended since I added the Tartarus in my latest center panel upgrade.
Side panels
Side panels (now I’m talking about the vertical panels on the sides) are probably the most complicated part of this setup: besides the Virpil Control Panels I’m using custom buttons and LEDs there. Nothing too complicated yet, but still a bit farther away from using ready made controllers. In this page I share more details about how I designed the panels and how they work. But first I’ll give you an overview.
If you want to create a custom button box or a panel, you need a way to transfer the button press into something that your PC / Windows understands. This can be done with Ardutino, but it’s easier to use a ready made USB controller. There are controllers named something like “Zero Delay Arcade USB Controller” available from e.g. eBay and they seem to work nicely, though with limited amount of buttons. A popular option are Leo Bodnar’s Universal USB Interface Boards you can use also to create actual joystick. I have both: Leo Bodnar for my side panels and the Zero Delay board for the center panel.
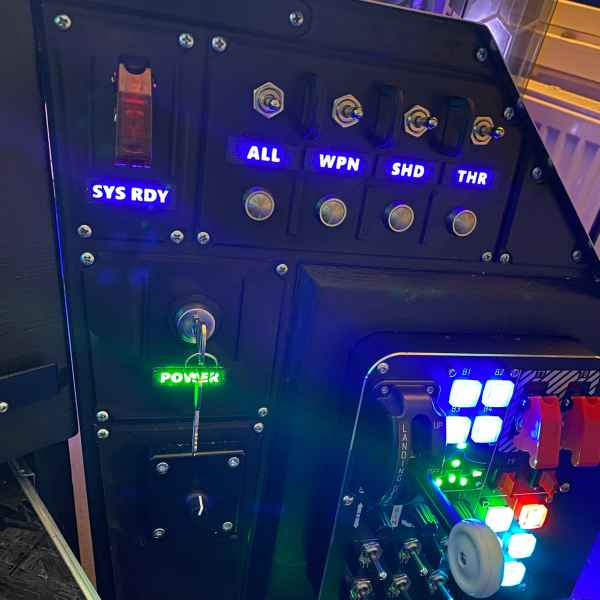
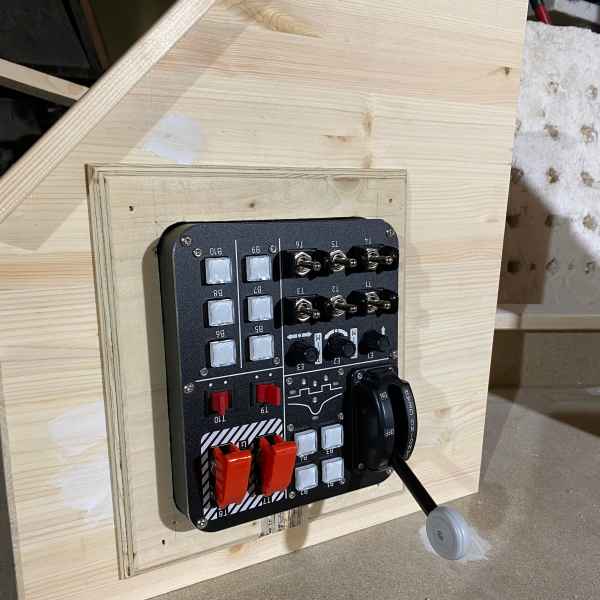
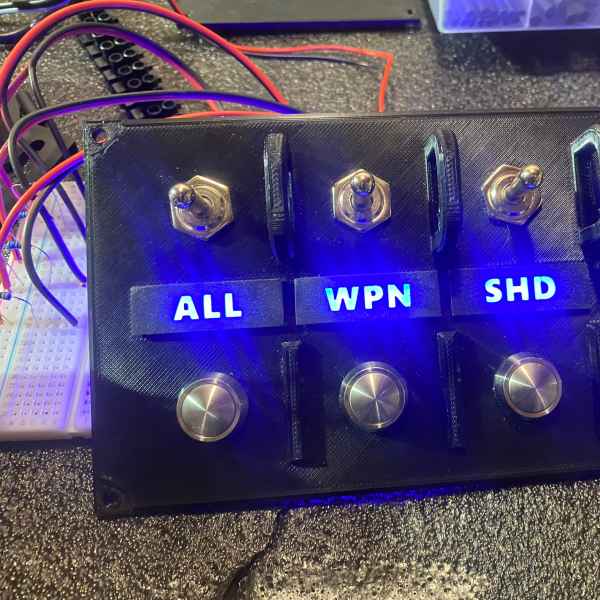
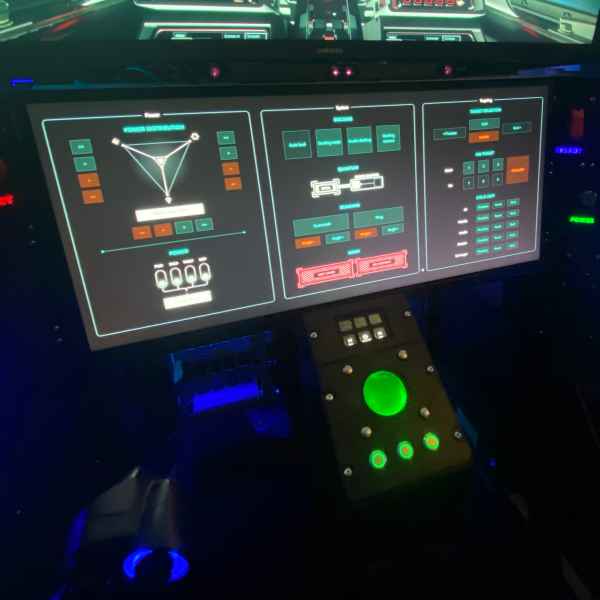
Besides the Virpil Control Panel #2, the right side panel has few controls for power management:
Sys rdy (flight ready) is an on-off toggle switch. When I flip it to on position, Joystick Gremlin sends a 0.1 second vJoy key press to Star Citizen so it basically is same as pressing the flight ready button.
Power management switches are momentary (on)-off-(on) toggle switches that put the particular systems on or off. The buttons below decrease power priority (I have the most important power controls on my joystick).
Power key works as a power button for my PC. Just a fun extra detail.
The dial below is an LED dimmer.
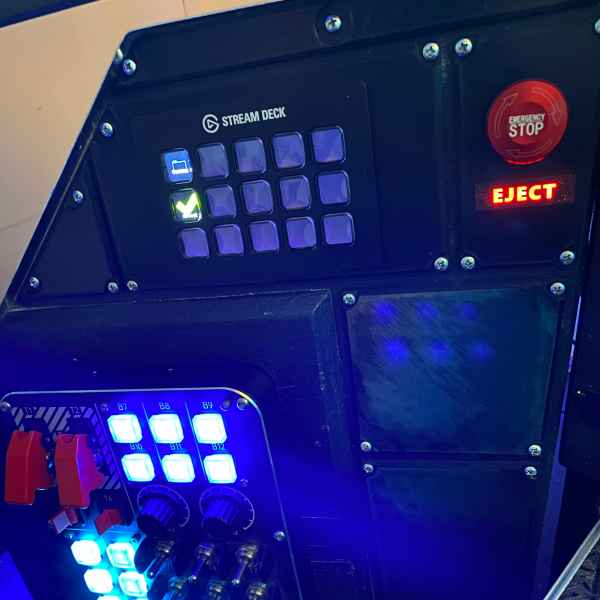
Besides Virpil Control Panel #1 the left side has following controls:
Stream Deck that I mostly use to control stuff outside the game, like Discord (voice channels, mute etc).
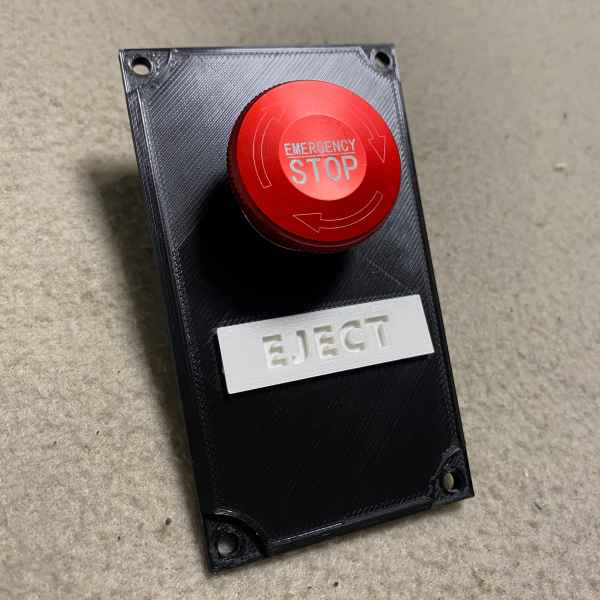
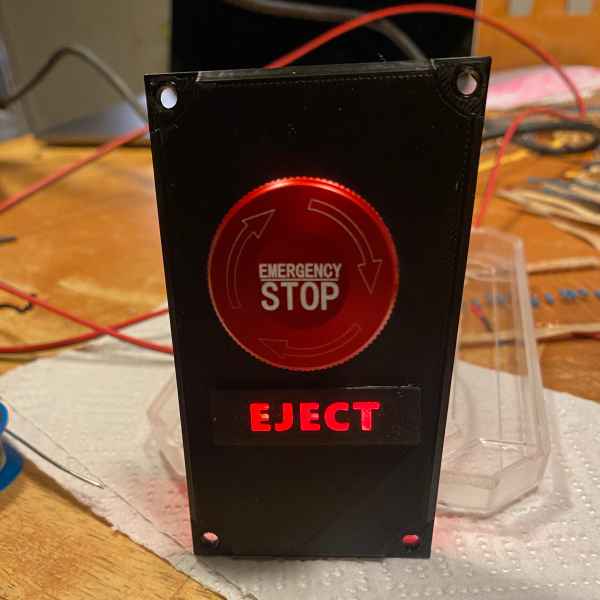
Eject button. I might some day design and print a proper lever but this will do for now.
Empty space below the eject button. I don’t know what I’d like to add there but when I get a good excuse to do something fun, I’ll add it there.
Starting point for the side panels with the Virpil Control Panel #2 before I changed the plugs to bottom.
And the custom panels…
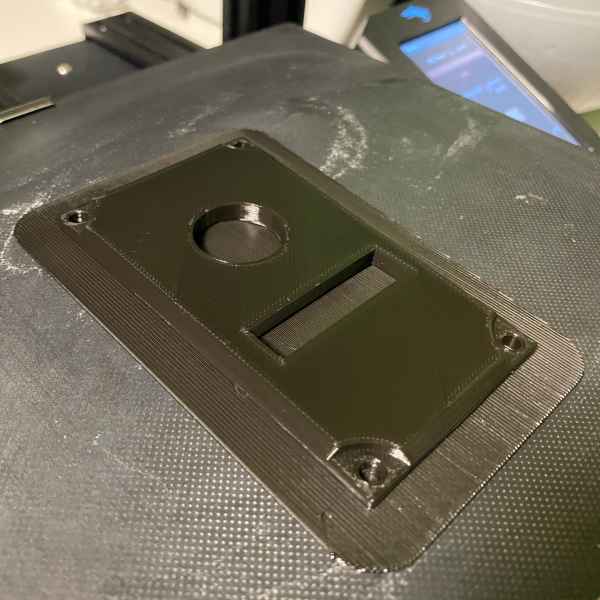
I designed the panels in Fusion 360 and then printed them with my Ender 3 V2 3D printer. The square hole is for the labels.
You could use any wooden, metal or plastic sheet for this and just drill a hole for the buttons. Afterimage Flight has made a nice series of videos about building a button box: Building a Gaming Cockpit – Let’s Build a Button Box.
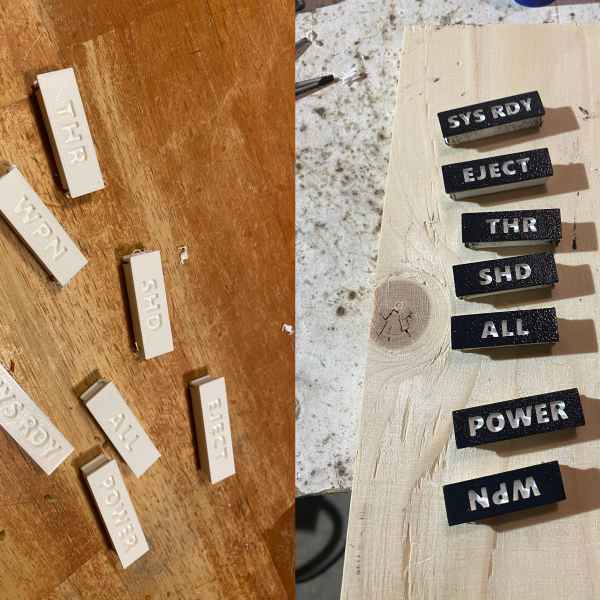
I printed the labels with white PLA and painted black, while being careful not getting any paint into text recesses.
Test fitting the labels.
There are holes for LEDs in the white labels. This is just a test run with red LEDs.
A test run with blue LEDs. Each label has three 3 mm LEDs and an appropriate resistor. Led groups are connected parallel.
Perhaps one day, if we’ll get good enough APIs for Star Citizen, I’ll make the labels change color based on if the system is on or off. This would probably require me to learn some coding to use Arduino to control those lights. But that’s just a fun new challenge.
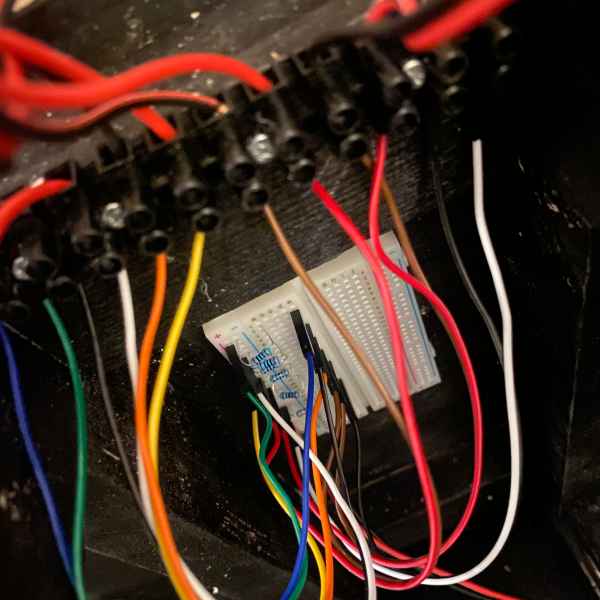
I’m using a generic 12 V 3 A charger for powering the LEDs. Wires go to the LED dimmer and from there to a breadboard that has the resistors. This way I can easily add new LED groups or change existing ones.
From the breadboard the wires to go a connection strip and then to LEDs. This way there won’t be any external forces pulling the wires out from the breadboard.
And just for extra safety, the whole thing is never powered when I’m not around.
Next I need to connect the buttons to my computer.
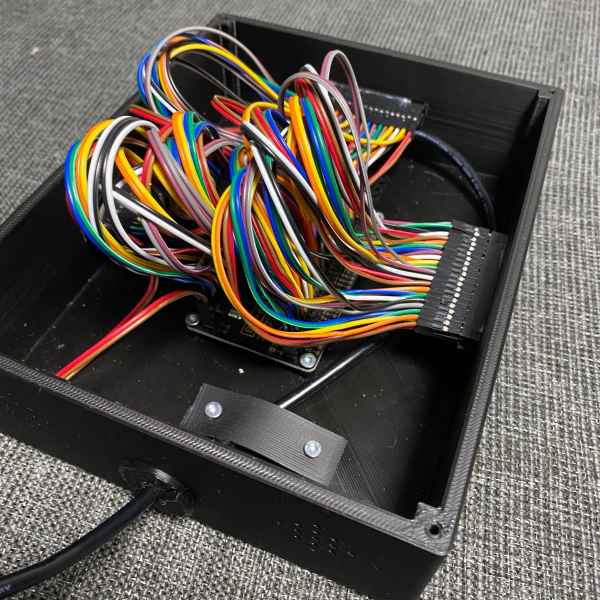
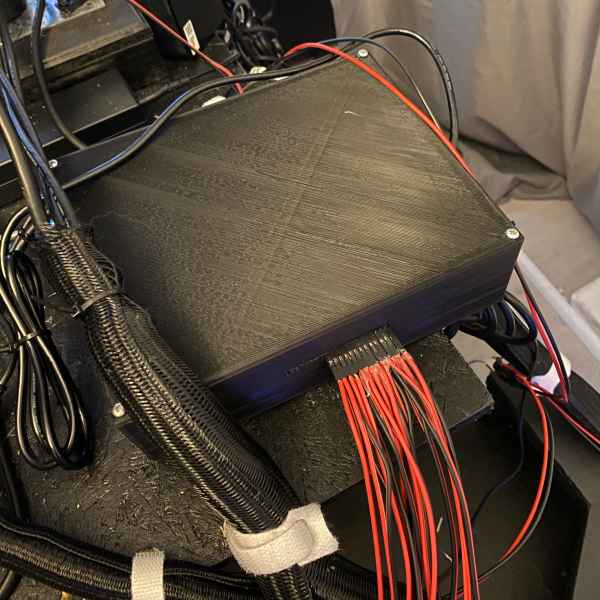
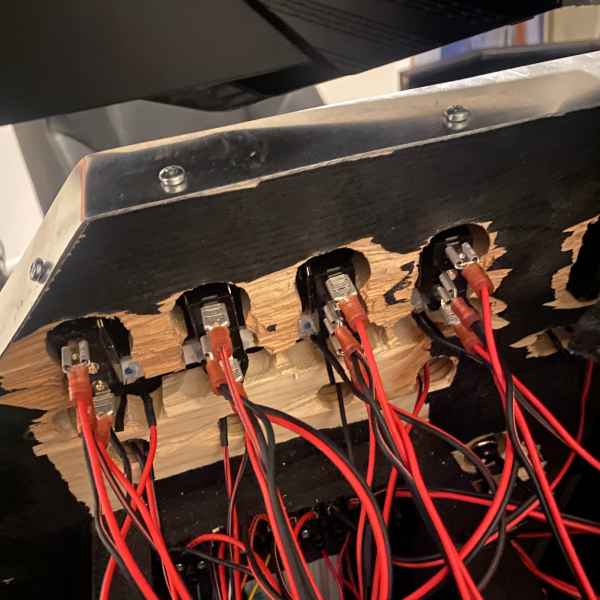
I’m using a Leo Bodnar 64 button controller for the extra buttons. This connects to a PC with USB and Windows recognizes it as a controller. I can add a pair of wires to connectors and use any button that just closes the circuit.
The box itself is quite a mess but I had these wires ready so it was easier to print a larger box than try to shorten the wires.
I can easily add new buttons just by connecting the wires to outside the box.
There are places for 20 buttons on three sides of the box, so I can easily add 60 new buttons total. Currently I have 14 so there’s room for growth.
And the wires go from the Leo Bodnar box to the switches. On the hindsight, I probably should have used different color wire for buttons and LED power wires.
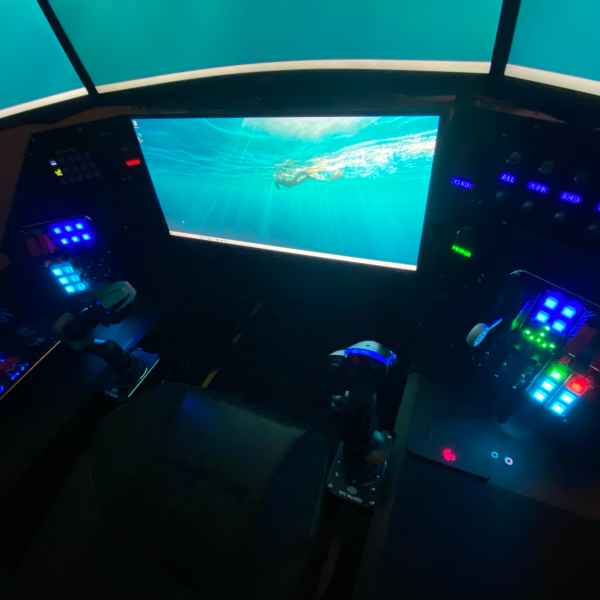
Center panel
Latest addition to my simpit is the new center panel. I started with a wooden panel and two tablets with GameGlass (a software that turns your tablets etc into touch panels for games) leaning to it. I just never liked this: it didn’t seem to be on par with the rest of my setup. GameGlass itself is a nice software, but the wooden panel wasn’t nice.
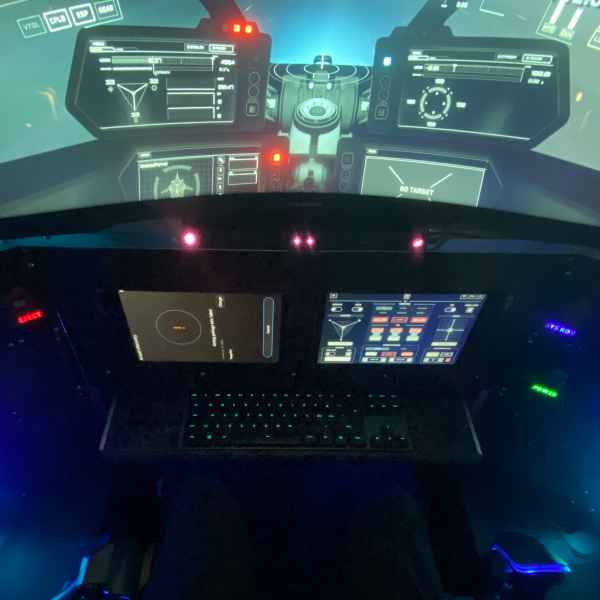
LG’s 25″ ultra wide display was basically perfect fit for my simpit. While not a touch screen, it was just too nice addition to pass, allowing me to build a somewhat F-35 inspired cockpit. Since it wasn’t a touch screen, I had to build controls for it.
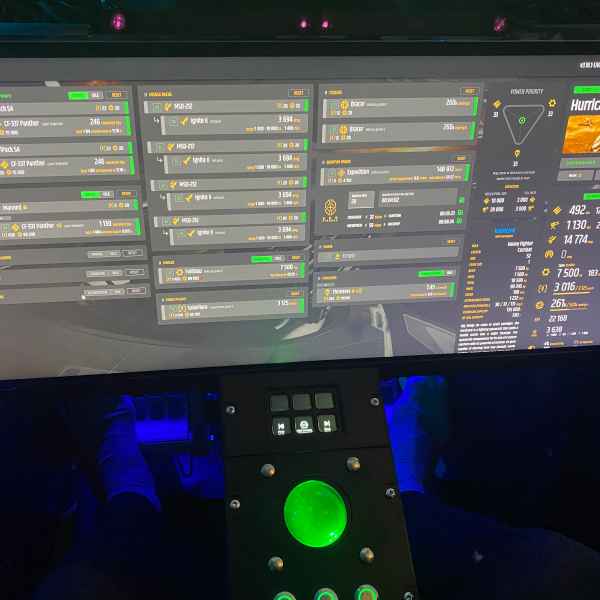
With Star Citizen, I’m planning to use it with more rare controls that I don’t need to access that quickly (I have most of the controls mapped into physical buttons) and in the future, hopefully I can display some useful data on it if CIG creates APIs.
Currently it’s much more useful with Flight Simulator 2020 with a software called Air Manager 4 (once I’ll get around to setting it up).
My old center panel was just a block of wood with two tablets leaning on it. While the keyboard shelf was handy, I never liked the panel.
I started by removing the old panel. I was able to use the Vesa mounts in the new display to attach it into the front panel structure.
New display in place. Fits like a glove. I was planning to build some sort of housing for it but it really doesn’t need one.
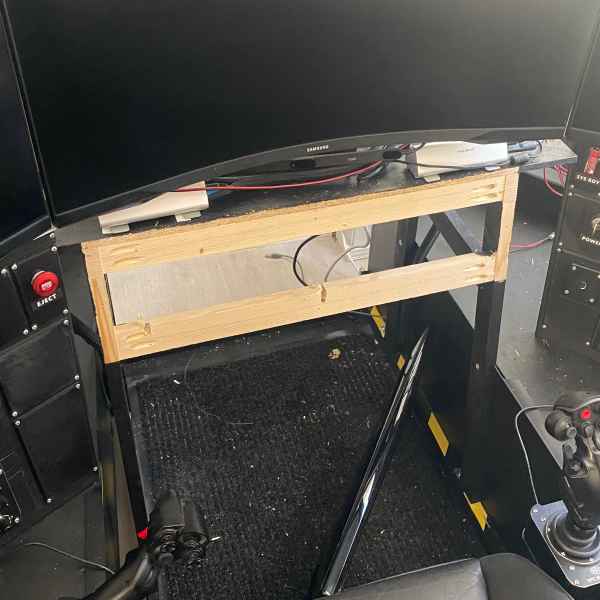
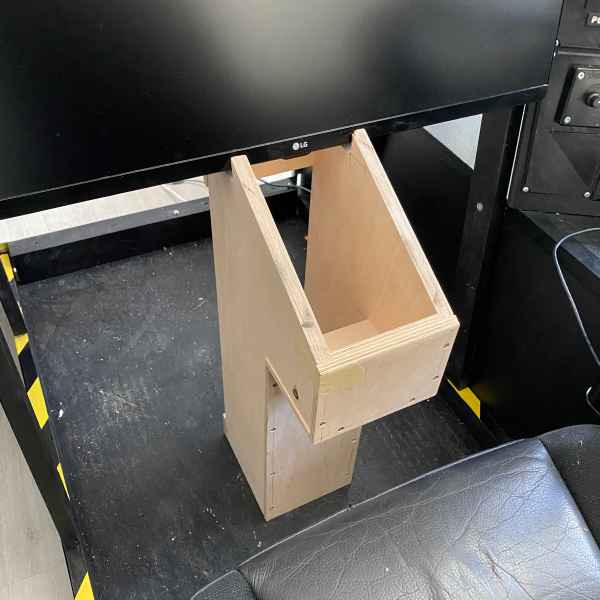
Since there wasn’t any room for the keyboard under the display, I decided to build a small panel for the space below the display. I could have attached the trackball to side but this was a nice opportunity to build something extra.
I started by building the basic structure from plywood.
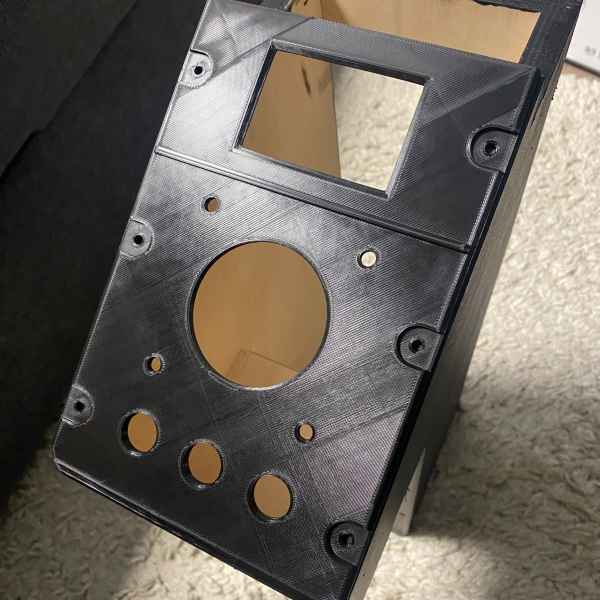
And designed and printed the panel with room for three buttons, a trackball and a Stream Deck Mini.
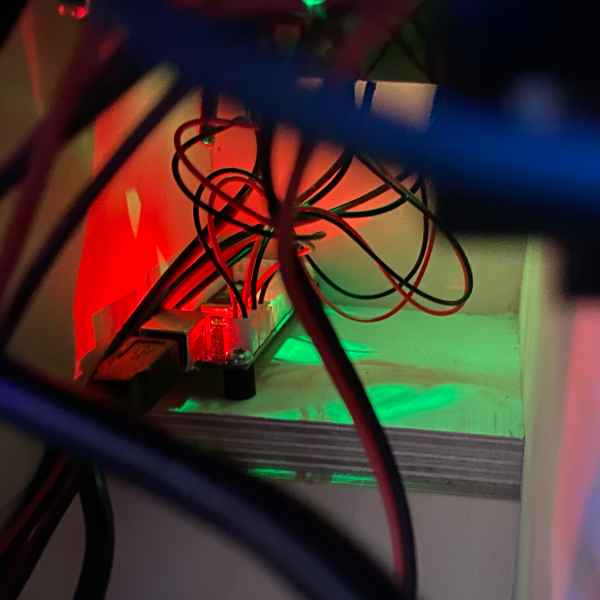
Insides are quite simple: my old Zero Latency Arcade USB Controller that I scavenged from my old button box for the three buttons (I’m using Joystick Gremlin to make them mouse buttons) and some wires going to an external computer.
I was planning to use Raspberry Pi for this but the availability was bad and prices were high so I ended up getting a cheap second hand Intel NUC computer for the center panel.
I’m running the GameGlass in the browser mode.
It’s not a perfect setup from usability point of view: GameGlass is really meant to be used with a touch device.
But it looks really nice and that’s good enough for me for now. And it does work, just not with anything I would need to access quickly. But I have enough buttons in my other controls.
I configured few Stream Deck buttons to browse open browser tabs so I can keep useful sites like Erkul open in different tabs and jump into them easily.